Installing Windows Server 2022 in VMware Workstation
This guide will show you how to install and configure Windows Server 2022 for AD vulnerability testing
Installing Windows Server 2022 in VMware Workstation
Active Directory (AD) is a key part of many IT infrastructures, making it a great focus for learning and testing vulnerabilities. By setting up Windows Server 2022 as a Domain Controller, you can create a safe lab environment to practice and explore AD security concepts.
This guide will show you how to install and configure Windows Server 2022 for AD vulnerability testing, step by step. Let’s dive in!
Prerequisites
- VMware Workstation Pro/Player: Ensure you have the latest version installed.
- Windows Server 2022 ISO file: Download the ISO file from the official Microsoft website.
- System Resources: Verify your system meets the minimum requirements:
- RAM: Minimum 4 GB (8 GB or more recommended).
- Disk Space: At least 20 GB of free space for the virtual machine.
Step 1: Create a New Virtual Machine
- Open VMware Workstation.
- Click on File > New Virtual Machine or select Create a New Virtual Machine from the home screen.
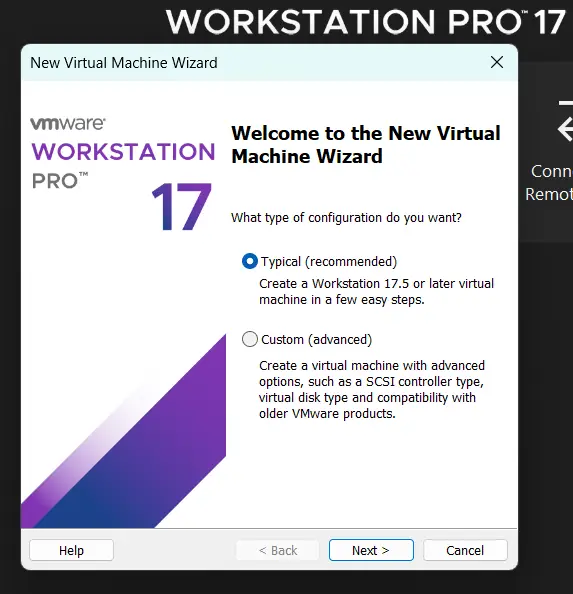
- Choose Typical (recommended) and click Next.
Step 2: Select the Installer Disc Image
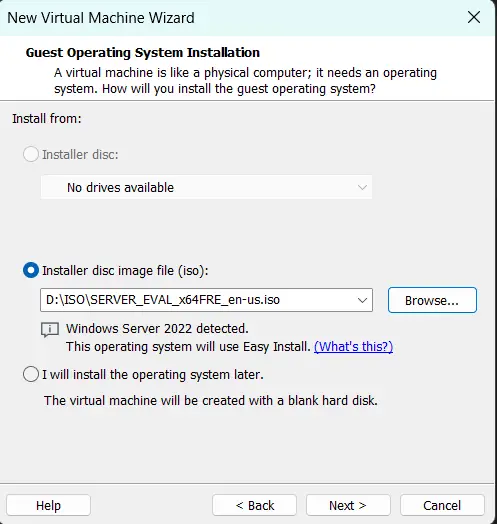
- Select Installer disc image file (ISO).
- Browse to the location of your Windows Server 2022 ISO file and click Next.
Step 3: Name the Virtual Machine and Set the Location
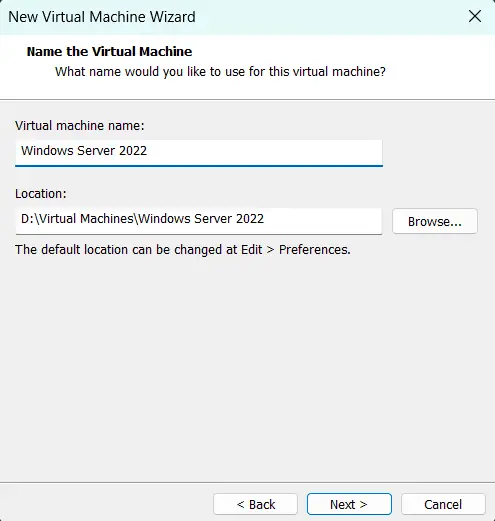
- Provide a name for your virtual machine (e.g., “Windows Server 2022”).
- Specify the location where the virtual machine files will be saved.
- Click Next.
Step 4: Allocate Disk Space
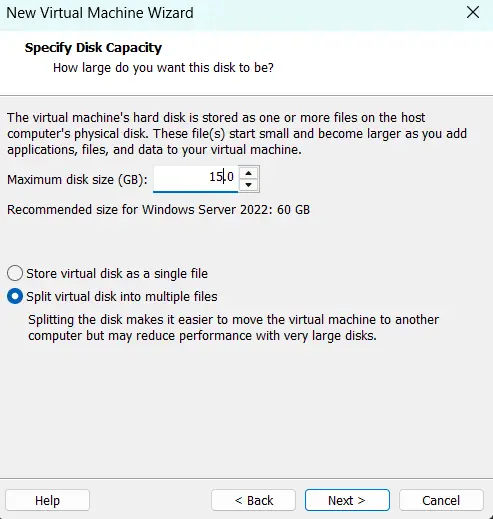
- Specify the maximum disk size (e.g., 15 GB or more based on your needs).
- Click Next.
Step 5: Customize Hardware (Optional)
- Uncheck Power on this virtual Machine and click Finish.
- Remove the Floppy from the Virtual Machine Settings:
Click Ok after making adjustments.
Step 6: Start the Virtual Machine
- Select your newly created virtual machine in VMware Workstation.
- Click Power on the virtual machine and press Enter when the Press any key to boot from CD or DVD message appears.
Step 7: Install Windows Server 2022
- Once the virtual machine powers on, the Windows Server 2022 setup will begin.
- Choose your preferred language, time format, and keyboard input method, then click Next.
- Click Install Now.
- Choose the virtual disk you created earlier and click Next.
The installation process will start, and the virtual machine will restart several times.
Step 8: Finalize Setup
- After installation, configure the following:
Step 9: Post-Installation Configuration
- Install VMware Tools:
- Go to the VM menu and select Install VMware Tools.
1
- Double click the VMware tools Follow the on-screen instructions to enhance performance and enable features like shared clipboard and drag-and-drop functionality.
- Optional: Configure Network Settings:
- Set a static IP address or join the server to your domain as required.
Your Windows Server 2022 virtual machine is now fully set up and ready for use.
This post is licensed under CC BY 4.0 by the author.


.webp)
.webp)
.webp)
.webp)
.webp)
.webp)
.webp)
.webp)